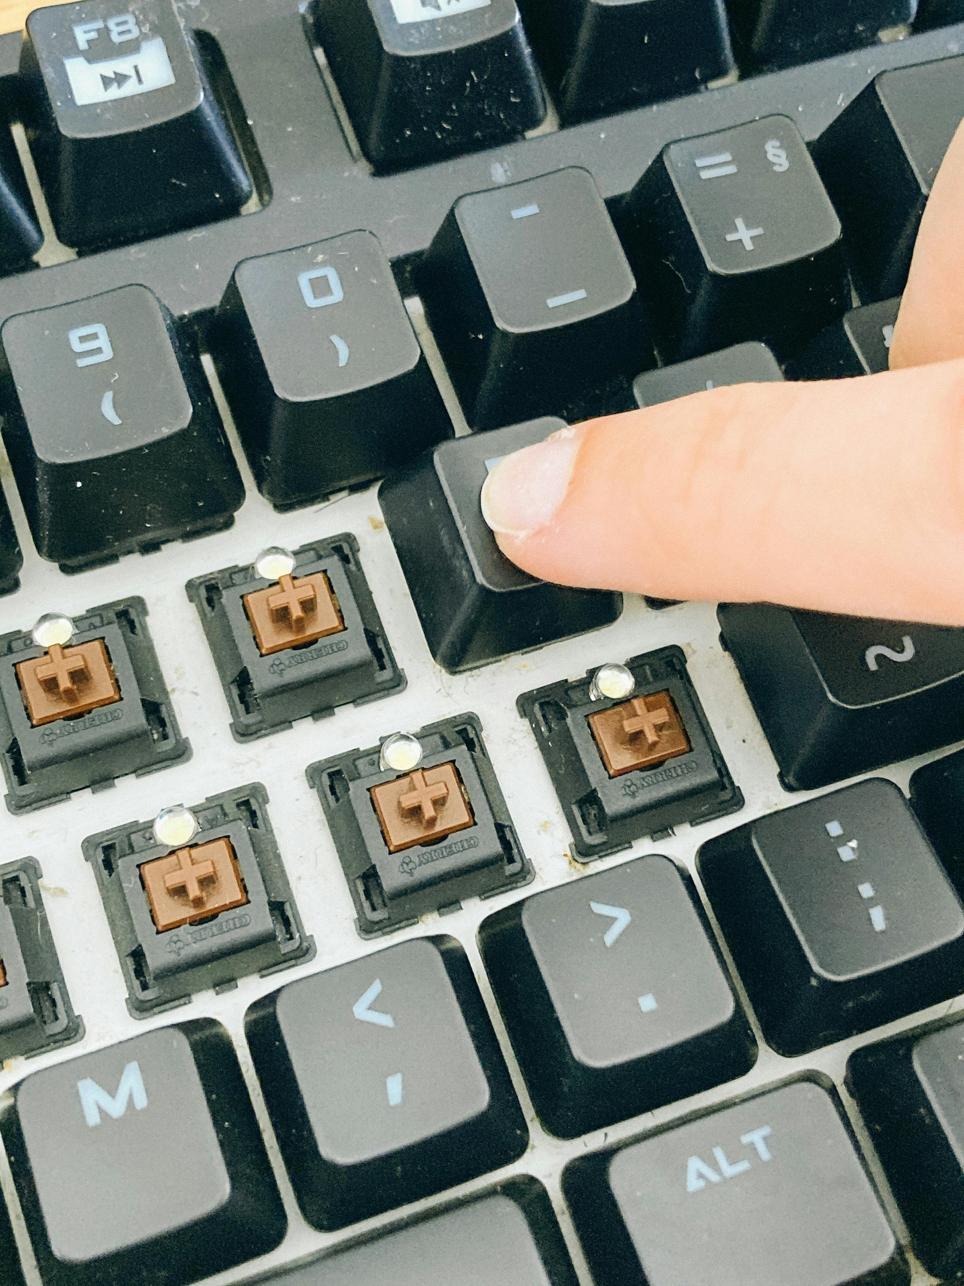
How to Fix Keyboard Keys
Introduction
For many, a malfunctioning keyboard can be a serious inconvenience. Whether it's due to a stuck key, a broken mechanism, or software issues, a faulty keyboard can disrupt your workflow and productivity. This guide aims to walk you through practical measures to restore your keyboard's functionality. We'll cover various troubleshooting steps, key cleaning techniques, and even preventive maintenance tips to ensure your keyboard stays in top shape.

Materials You Will Need
Before diving into the repair process, gather these essential materials: - A small flat-head screwdriver or keycap puller - Isopropyl alcohol and cotton swabs - Compressed air canister - Replacement key components (if necessary) - A clean microfiber cloth
Having these items at hand will help streamline the repair process and ensure you have everything needed to get your keyboard back in working order.
Initial Troubleshooting
The first step to fixing any keyboard issue is initial troubleshooting. Start by checking if the problem is hardware or software-related. Plug your keyboard into another device to see if the issue persists. If the keyboard works fine on another device, the problem may lie within your computer settings or software.
Ensure that your keyboard is well-seated in its port and that there are no loose connections. Sometimes, simply unplugging and replugging your keyboard can resolve minor issues. Also, check the battery if you're using a wireless keyboard. If all else fails, turn off your computer and restart it to see if this resolves the issue.
Fixing Stuck or Unresponsive Keys
Stuck or unresponsive keys are common problems and usually have simple fixes. Here's a step-by-step guide to resolving these issues:
How to Safely Remove a Keyboard Key
- Power down your device to avoid any electrical hazards.
- Gently wedge a small flat-head screwdriver or a keycap puller under the key.
- Carefully pry upward to pop the keycap off without damaging the underlying mechanism.
Cleaning Beneath the Keys
Once you've removed the keycap, you'll likely find dust, debris, or even liquid underneath: 1. Use a can of compressed air to blow away any loose debris. 2. Dip a cotton swab in isopropyl alcohol and thoroughly clean the area beneath the keycap. 3. Make sure to dry the area completely before reassembling the key.
Replacing the Key
After cleaning, it's time to place the key back: 1. Fit the keycap over the underlying mechanism. 2. Gently press down until you hear a snap or feel it fit into place.
Testing the key after reassembly ensures the fix was successful.

Repairing Broken or Loose Key Components
If cleaning doesn't resolve the issue or if the key components are damaged, you may need to take a deeper dive into the repair process.
Identifying Damaged Key Mechanisms
First, inspect the key and its underlying mechanism: 1. Look for breaks or cracks in the keycap or scissor switch (the plastic mechanism under the key). 2. Check if the keycap won't attach due to a worn or broken component.
Sourcing Replacement Parts
You can find replacement parts at electronics stores or online marketplaces: 1. Search for parts specific to your keyboard model. 2. Purchase from reliable vendors to ensure compatibility.
Reassembling and Testing the Keys
After sourcing your parts: 1. Replace the damaged components by fitting them exactly where the old ones were. 2. Reattach the keycap and test the key to ensure functionality.
This meticulous approach ensures that all broken elements are fixed, preventing future issues.
Software Issues
Software glitches can also be a root cause of keyboard problems. It’s worth addressing these potential issues with the following steps:
How to Update Your Keyboard Drivers
Outdated or corrupted drivers can cause your keyboard to behave erratically: 1. Go to Device Manager on your computer. 2. Locate your keyboard in the device list. 3. Right-click and select 'Update driver'. 4. Follow on-screen instructions to complete the update.
Troubleshooting Software Conflicts
Software conflicts might disrupt keyboard operations: 1. Restart your computer in safe mode. 2. Check if the keyboard works correctly in safe mode. 3. If it does, a software application might be causing the issue. Uninstall recently added software to identify the culprit.
To transition smoothly to the next segment, preventive measures can help you avoid these software and hardware issues in the first place.

Preventive Measures
Taking preventive measures ensures the longevity of your keyboard and minimizes the need for repairs.
Tips to Keep Your Keyboard in Good Condition
- Avoid eating or drinking near your keyboard.
- Use a keyboard cover to prevent dust and debris buildup.
- Store your keyboard in a clean, dry place when not in use.
Regular Cleaning Schedule
- Clean your keyboard at least once a month.
- Use a can of compressed air to blow out dust and particles.
- Wipe down the surface and keys with a microfiber cloth lightly dampened with isopropyl alcohol.
Following these preventive measures can keep your keyboard functioning smoothly for a longer time.
Conclusion
Fixing keyboard keys doesn’t always require professional help. By following these detailed steps, you can troubleshoot and resolve common keyboard issues yourself. From cleaning and replacing key components to addressing software problems, this guide covers everything you need to know to keep your keyboard in top condition. Happy typing!
Frequently Asked Questions
Why are my keyboard keys not working?
This can be due to hardware issues, dust or debris, or software glitches.
Can I fix keyboard keys without professional help?
Yes, many keyboard issues can be resolved with simple DIY techniques.
What should I do if my keyboard key is physically broken?
Identify the broken part, source a replacement, and follow repair instructions to fix it.


